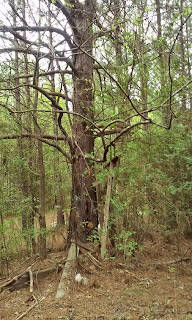
We ended up bringing in 14 bales of pine straw from off of the farm. In the future I think we can just pull from the farm, but honestly, this was just easier. At about $3 each it was worth it to us to save the time and energy that we would have spent raking and gathering. We brought in the 14 bales, used about 10 of them on the beds on top of the mulch we had already added. It made it a lot more aesthetically pleasing as well as filled in areas that were sparsely mulched. We used the other 4 bales to surround all of our sensitive little saplings. The apples would probably be alright without filling the cage to the height that we did, but we did them last and the cage was already in place, so we just used the last of the pine straw. The paw paws are more sensitive so they have plastic wrapped around the outside, about three quarters of the way around the cage. We did the same thing to the fig, including the plastic, and laid some pine straw around the bottom of the goji berries and the gladiolas as well. All of the pine straw in the cages is very loosely placed in the cage. We're going for insulation, not suffocation. We'll leave this set up in place for the next two months or so during the coldest months. Then, probably in early February, we'll take it all down, prune them while they're dormant, and put it all back up until after the last frost.
Tuesday, December 22, 2015
Winterizing the Orchard
We ended up bringing in 14 bales of pine straw from off of the farm. In the future I think we can just pull from the farm, but honestly, this was just easier. At about $3 each it was worth it to us to save the time and energy that we would have spent raking and gathering. We brought in the 14 bales, used about 10 of them on the beds on top of the mulch we had already added. It made it a lot more aesthetically pleasing as well as filled in areas that were sparsely mulched. We used the other 4 bales to surround all of our sensitive little saplings. The apples would probably be alright without filling the cage to the height that we did, but we did them last and the cage was already in place, so we just used the last of the pine straw. The paw paws are more sensitive so they have plastic wrapped around the outside, about three quarters of the way around the cage. We did the same thing to the fig, including the plastic, and laid some pine straw around the bottom of the goji berries and the gladiolas as well. All of the pine straw in the cages is very loosely placed in the cage. We're going for insulation, not suffocation. We'll leave this set up in place for the next two months or so during the coldest months. Then, probably in early February, we'll take it all down, prune them while they're dormant, and put it all back up until after the last frost.
Saturday, December 12, 2015
Wheel Bug
I found this professional assassin while clearing out the front. He's a beneficial bug that eats a lot of pests, so he's certainly welcome to stay. But I'm not planning on petting him.
Wheel bugs are common in Eastern North America, but they like to hide and ambush their prey, so you don't often see them. I'm elated to see him because he's a positive sign that my little ecosystem is healthy (and pesticide free). Seeing the apex predator of a food chain usually means that the food web beneath them is thriving.
Have a good day little buddy, so sorry to disturb you. Please don't bite me, just go about your day. I'm sure you've got a lot of murdering to do...
Tuesday, December 8, 2015
Mulching for Winter
Here's a before and after comparison of the mulching Meredithe and I completed today. Technically the pictures are of two different beds, the before is of the North bed, the after of the South bed, but you get the idea. The smaller clippings that you can see piled to the right in the before picture were the most useful, having been clipped this spring and summer and decomposing the most. Meredithe put the best stuff underneath our struggling gardenia and azalea bushes. The remainder of the mulch was the smaller stuff from the bottom of the brush pile that had been sitting undisturbed since the end of March. It's mostly broken down blackberry debris and stems of large grasses from when we first cleared the garden area. We were running a little short of the really good broken down material so we raked out some of the dead taller grasses from the longer brush area you can see in the top left of the before picture. We were able to cover both beds with about 1-2" of fairly well broken down mulch material without having to bring in anything from off of the farm. We've considered adding pine straw on top to ensure we've got a good 2" of mulch evenly spread across the beds. It would make them look more uniform and aesthetically pleasing as well. We have pine straw on farm obviously, but we may bring in a few bales from off farm too, maybe next week.
Sunday, November 29, 2015
Vultures! (video)
Some kindhearted individual decided to dump a deer carcass on the farm recently and it has attracted about 20 or 30 vultures to the property. I originally thought that the deer may have been shot in the national forest and ran onto the farm. Upon further inspection, however, I noticed that someone drove a truck all the way down the drive and ran over the paw paws to turn around and dump the carcass. Luckily the paw paws were young and seem to have just bent over and not snapped. The deer was not so lucky.
Wednesday, November 25, 2015
Clearing the Front
We've almost cleared the entire front of the property to the left of the driveway, as you're headed North up the driveway from the road. It was completely overgrown and through the hard work of everyone two weeks ago a lot of progress was made! I cleared for another six hours on the following Sunday and almost finished the remainder of the front by hand.
There was a small stand of young Oaks getting established along the Western edge of the property. I wanted to keep those, as well as all of the persimmons. I also kept well established trees, mainly 5 years or older, of varying species. It was very interesting to see the little clusters of trees living together. A Pine family, overlapping with Oaks, overlapping with Persimmons, but all in their own little stands.
I left three large brush piles behind to save on time, hopefully we'll chip them down soon. I think it will take us three more full days of work to finish up this project, but I can see the light at the end of the tunnel! You can see straight through from the road all the way to the garden for the first time. You can also see through from the driveway looking West toward the neighbors for the first time.
Tuesday, November 17, 2015
The Wedding Arbor
The whole family was out this week to help out on the farm! Lindsey and John, Peyton and Ruby, Ray, Meredithe, Amelia, Carley and I, and our friend Mat were all working hard. Everyone did their part, mostly clearing the front yard. We took out mainly privet, juniper, blackberries and other underbrush. We kept a few pines, a few Bradford Pears, a couple maple and all the oak and persimmon I could find. Everything else got chopped and dragged over to the main brush pile. Hopefully soon we'll rent a wood chipper, turn it all into mulch and redistribute it out over the garden beds and around the trees etc. I'll show you the amazing progress we made in my next post, but the big accomplishment this week was the wedding arbor. Ray and John put it up in what seemed like no time at all! Mat took our pictures underneath it and all over the farm for our "save the dates" and they're beautiful! The arbor really helps the wedding garden come into focus. Just over five months from now I'll be marrying the love of my life, right under there...
Thursday, November 12, 2015
Rose Hips
This is our first harvest of rose hips. Rose hips are the resulting fruit following the successful pollination of rose flowers. Just as with many fruits, you can do all sorts of cool stuff with them! Jams/jellies, syrups and wine can all be made from rose hips, but my favorite is rose hip tea.
Rose hips have an extremely high concentration of Vitamin C and also contain powerful antioxidants, making them a great candidate for herbal teas and remedies. During World War II, British citizens were encouraged to harvest wild rose hips when German U Boats made citrus fruits hard to obtain.
Often mixed with hibiscus, the resulting tea is tart and delicious! They ripen beginning in late summer and throughout the fall. We probably should have waited until the first frost to harvest them, hopefully the plants won't burst to life right before the frosty weather starts, but we couldn't take it any longer... we had to have some of that delicious tea!
Saturday, November 7, 2015
Clearing the Front Fence
Clearing this little section up front by the fence took several hours. I was working with a pair of extendable hedge shears, a bypass lopper and my trusty folding saw. I removed one low hanging branch from the pine, but most of the project was comprised of removing young privet. There were thorny vines running all through the privet and up the trees making the tedious chore that much more difficult. There was a little bit of sumac, which I've convinced myself is of the non poisonous variety. There were also a few poison ivy vines, definitely of the poisonous variety, although not the largest I've seen on the farm. I cut out the sumac and took it over to it's own brush pile, separate from the main pile. I wanted to keep it separate so I don't burn it by accident, just in case. I cut about a one foot section out of each vine of the poison ivy and left everything behind, avoiding the area as I worked. Most of the remaining smaller trees are wild persimmons, they had already lost all of their leaves for the season since they were in such dense shade. Hopefully they'll fair better next year with the newly available sunlight.
Thursday, November 5, 2015
Planting Fall Bulbs
There was finally a break in the rain and we were able to get our fall bulbs planted. October was a really wet month and November is shaping up to be wet as well. We're finding out about how well our soil drains, that's for sure. The Western end of the South bed felt a little bit like planting in a mud puddle, but the rest of it seemed to be draining well.
Meredithe, Amelia and I put in 225 bulbs in about two hours. First we put in 60 Joan of Arc Crocus. We planted them in groups of 5, six groups in each bed spaced in between the bushes. You can see the small area of disturbed soil out in front of Amelia in the foreground. She's planting some of the 150 mixed daffodils that were planted in groups of 12-13. They're the bulbs that are laid out in a rough pattern in the picture. We also put in 15 City of Haarlem Hyacinth. They're placed at the end of each bed and opposite the bushes around the outside of each bed. We planted the one odd bulb with the Gladiolas down by the driveway.
The Crocus are a bright white, the Hyacinth are ivory in color and the Daffodils are mixed varieties, but should be comprised mainly of varying shades of yellow. Hopefully, they'll all be up in time for the wedding in late April. We'll also be planting annuals around them in the Spring to fill in the beds.
Sunday, October 25, 2015
Widening the Lower Turn Around
I wanted the turn around down by the muscadines to be a complete loop so I widened the Northern side of the road to allow for turning without having to reverse. The top pictures are from the muscadines facing West up the path back to the front. The lower pictures are facing East down the path to the clearing and muscadines. The rest of the turn around is to the left in the top pictures, to the right in the bottom pictures. It was pretty straight forward, anything in this area has to go. Had to remove a few oaks which was sad, but most of it was privet.
Friday, October 23, 2015
Tilling the Beds
The next week I removed the lattice and ran the Gravely over a section of the North bed that had a lot of blackberries and tall grasses in it and was difficult to pull. I'd say it was only about a third of the one bed. It only took 30 minutes or so. After the beds were clear I began tilling.
I rented a Honda FRC800 8HP rear tine tiller from my friends over at Madison Rentals. They're a locally owned and operated tool rental business. I also ordered the Gravely from them earlier this year. They're conveniently located right off of I-20 on my way to the farm on Eatonton Rd 129/441 just on the other side of the lake.
The tiller worked great! On the first pass I was a little apprehensive because it seemed like the tines were just skipping along the top of the dirt and I had to hang on tight to keep the thing from running away from me. By the third pass I was dug in a few inches and running along smoothly. I ran it straight through with the exception of just one short break from about 9:30 am until 2:30 pm. The beds were originally marked at 60' x 5', but I'm an overachiever so the tilled area is realistically more like two 60 'x 8' beds, almost 1,000 square feet! I'd estimate the average completed depth is somewhere between 6" and 8". Not sure if 200 sq/ft per hour is a good work rate or not, but that's about what it was.
In the bottom picture, the four larger white posts mark the corners of a small compost pile. Just to the left the disc harrow is visible, completely freed from the blackberries. The white blob in the middle is the wellhead covered by an old billboard used as a tarp and weighed down by cinder blocks. Hopefully we'll construct housings for both the wellhead and the compost before the wedding. The bushes in the middle near the back of the wedding garden are a butterfly bush and an unidentified bush that we liked, so we kept. The planted azaleas and gardenias are barely visible along the inside edges of the beds. They all got fried in our brutally hot and dry July. Four of the six gardenias have bounced back nicely. I think the other two are toast, but we'll see if anything happens this spring. The four azaleas lost all of their leaves, and look like they're in better shape than the two iffy gardenias, but they're all on the iffy list until this coming Spring.
Wednesday, October 21, 2015
Clearing in the Back
In the third picture you can see on the far side of the mimosa where there are the two rows of muscadines, an unidentified red variety and Carlos Bronze. Three rows of blueberries are planted between the muscadine rows. The tree in front of the center row of blueberries is a Bradford Pear. It still has multiple trunks and is partially shading the muscadines, so I'm planning on trimming it back even farther this winter. Along the edges I've identified a few small Oaks that I'm going to promote by trimming out their competition, mostly pine.
Before |
After |
After |
Sunday, October 18, 2015
Butterfly Bush
Those white conical shaped flowers lasted all summer long with no pruning, but pruning off older flowers can encourage new flowers to form. With very little maintenance they should keep flowering right up until the first frost. We planted two of them at the "back" of the wedding garden figuring they'd be easy to keep alive and should get fairly large, fairly fast... up to 16 feet tall! Well, one of the two didn't make it through our brutally hot and dry July, but this one appears to be doing great and we could spread it from cuttings if we wanted. However, these bushes will out compete a lot of the native species so the plan is to limit them to two massive specimens.
They are great nectar producers and attract butterflies, as demonstrated by this gulf fritillary. But not all species of butterfly like the same thing so we'll be encouraging the native species to hang around as well, goldenrod being a prime example.
Wednesday, October 7, 2015
Home Grown Luffa
Did you know you could grow your own luffa (AKA Loofah)? Well, surprise surprise, you can! Luffa are in the gourd family and crawl on a vine that sometimes reaches up to 30 feet in length. Luffa are edible when young and only a few inches long, you could eat the one being highlighted in this picture. At this stage they're kinda like okra, most often used in Chinese and Vietnamese dishes. When allowed to continue growing toward maturity they become increasingly fibrous.
When growing them for use as a bath sponge, which is what Meredithe is doing with them, you can let them grow until the first frost hits them. They take a while to grow, requiring 150 to 200 warm days to reach full maturity. Once hit by frost, however, they become susceptible to rot. We're going to let them grow until the end of fall, and hopefully time it perfectly so we can just peel the skin off and enjoy our new bath sponges!
Wednesday, September 30, 2015
Muscadine Harvest 2015
So, as expected, three quarters of this years muscadine harvest is represented in this picture. If you'll recall from April, or you can use the archive to check out the post entitled "Muscadines!" to help you recall, we weren't expecting much of a harvest this year.
The muscadines had not been trimmed in at least two years, possibly much longer. This past winter I trimmed them drastically and began the process of training them into a four arm kniffen style trellis system. I kept plenty of vines, unsure of their response to my trimming. All of them exploded into growth as soon as Spring hit. The muscadines, however, won't fruit on wood from this year, but will emerge from the one year old wood next year.
These three and one other muscadine on the same little vine represent the entire harvest, only because this one vine somehow managed to evade the drastic pruning this past winter. But it's cool to see what they look like!
These are Carlos Bronze muscadines (AKA Scuppernongs). This variety represents half of our vines. We haven't yet identified the other red variety of muscadines, but we aren't picky.
Next year we should see a ridiculously large harvest and then in subsequent years I plan on alternately pruning four of the eight vines more heavily in order to produce half the full capacity harvest annually, instead of a doubly large harvest biennially.
Sunday, September 27, 2015
The Versatility of Privet
Don't mind the mess, you're looking at the beginning of a hedge. While clearing acres of Georgia pine forest clogged up with tall, scraggly looking privets it was brought to my attention by Meredithe's aunt, Nancy, that privet is extremely versatile and can be trained into many different shapes and forms. If you'll look back at the post titled "Clearing the Driveway Trees" you can see the privets coming up through the duct work around the base of the tree all tall and scraggly. The bush you see before you is the same exact group of privets, trimmed down to the ground in March. They immediately sprang back to life and started shooting for the sky. If, however, you continue to prune them hard (seriously, HARD, they're persistent) you can train them into a much more attractive bush or hedge. I trimmed these at least four or five times over the summer every time they reached two feet tall I knocked 'em back down to 18 inches or so. They learned rather quickly and began branching out horizontally rather than continuing their concerted effort to go vertical. I plan to keep allowing them to spread around the base of the tree and form a nice little hedge. I may even continue the hedge down the side of the driveway, new plants seem to spring up from everywhere! Removing them from the landscape seemed like a daunting task, turning them into hedges surprisingly seems more manageable.
On a side note, the rectangular area outlined in white in the foreground has two different ground cover transplants that were brought from Meredithe's cousin Tish's house in Monroe, GA. If you can pick them out, the bright green areas are Creeping Jenny and I believe the other ground cover which is the barely visible wider leaved plant is some variety of spiderwort. They seem to be doing ok, but maybe i'll pull out some of their competition next spring and see if I can't get them to really spread around the base of the hedge.
Monday, September 21, 2015
Apple Tree Update
Look at all of the growth on the apple tree! All of these leaves sprang from the apple tree almost immediately after the other leaves were eaten by deer. I don't know what effect all of this late growth will have on the tree's ability to store energy for the winter, but it looks even better than the untouched one with all of it's same old leaves. Keep those fingers crossed! Hopefully they'll both make it through this winter!
Sunday, September 13, 2015
Apple Trees
So I learned the hard way that deer REALLY like apple trees. They like apples, they like the leaves, they like the bark, they like everything about these trees. Also, they aren't the gentle creatures from the Disney movies. The first picture is one of our apple trees which made it unscathed until I got the fence up around it. The second picture is of an apple tree that used to be the same size as the other one. We got these trees on sale outside of a Kroger for $3 each. We put them in the ground late in the Spring as a $6 gamble, long after we should have planted them. By the time I got the fences up two weeks later it was out of necessity to save them. Clearly, I should have made building the fences a priority. I cut off the damaged branches just above a promising looking bud and am hoping that they rebound. One is a Mollie's Delicious, the other is a Fuji. Not sure which one is which since I mixed up the tags at one point. Not my proudest project to date, but it'll be fun finding out which one is which if they make it to maturity.
Tuesday, September 1, 2015
Praying Mantis
Check out this little guy! Our pawpaws tend to attract all kinds of beneficial bugs. I've seen several different species of spider making webs on or around this particular plant before, but today I saw this little praying mantis. He doesn't eat leaves, he's an ambush predator waiting on other insects to try and eat our pawpaw and then WHAM! Go get 'em little guy, give 'em hell.
Monday, August 24, 2015
Disc Harrow
While trimming up a section of the blackberries Meredithe, Peyton and I uncovered this old disc harrow. It's a cool old farm implement used for plowing up the earth into little slivers, sometimes for weed disposal but usually for planting. It can be attached to any tractor with a three point hitch. It's cool, but we're not there yet. In the meantime it's a cool old lawn decoration.
Saturday, August 22, 2015
Wild Persimmons!
We've finally identified the wild persimmon trees! Our neighbor Dennis told us that we had persimmon trees growing wild, but we had so far been unsuccessful in attempting to identify them. Once they started fruiting Meredithe found one of the trees down in the back by the muscadines. I had cleared out several smaller trees in that area in late winter when I was severely trimming the muscadines and luckily decided to keep a couple of the older trees. This persimmon tree being one of them. Luck. Pure, simple, luck. Now that we know what the leaves and bark look like we can spot them pretty easily and they are EVERYWHERE. I cleaned up 4 more of them down by the front. Peyton, Meredithe and I rescued a larger tree from vines by the driveway leading over to Dennis'.
So what, exactly, is a persimmon you might be asking. Well, they grow to be anywhere from half an inch to four inches across. The one in this picture is young and green and will hopefully ripen to a slightly larger yellow/orange to orange/red fruit. They kinda look like a tomato.
Once they're ripe they're super sweet and soft. You can eat them raw and quartered, or some varieties you may want to peel off the skin first. You could also dry them for storage, or enjoy them cooked. If they're super ripe you can just pop the top off and eat the insides out with a spoon!
Tuesday, July 28, 2015
Blueberries
This is one of three such collections of blueberries so far this year. We pick the ripe ones about once a week. We only have a few bushes and they aren't producing very well except for one that is more tree like in structure. They were planted in rows between the muscadines and when the muscadines took over for a few years without maintenance the blueberries suffered. We had to cut back some of the blueberries to get them untangled from the muscadines. To be honest, we didn't even know they were blueberry bushes at the time. We've got one tall bush that produced most of these berries and 4 or so more that are making a strong comeback and should produce for us in coming years.
Saturday, July 25, 2015
Opening Up the Driveway
We are hoping to get a brush cutter soon which will make this sort of task much easier, but until then we just wanted to open up the driveway a little bit right by the road. The driveway has a slight bend in it and we wanted to be able to see straight down the drive to the road and mailbox. Meredithe mainly used hedge shears and I stuck to my favorite tool, a Fiskars 9047 folding hand saw. It took us a few hours, but we opened up a significant area which should give us somewhere to start when we get the Gravely Pro 24.
#Fiskars
#Gravely
Thursday, July 23, 2015
Chicken Coop Roof Close up
Here is a closer shot of the inside of the right side of the chicken coop. There are two doors, one into each coop front and back. We added the three new posts to better support the wire and billboard roof. It's actually surprisingly dry and sheltered in the coop. The coop sits back in the woods about 20 feet so there is a light breeze, but it doesn't feel drafty considering how open it really is.
Sunday, July 19, 2015
Wild Blackberries
Wild Blackberries |
There are patches of wild blackberries growing all over the place, but there is a particularly large patch growing along the Northern edge of the garden. We left a strip 10' x 30' of the blackberries when we cleared the main garden this spring. The berries aren't managed in any way so the crop is small and difficult to harvest for the amount of area that they are currently occupying. We started trimming them back in early June as we began to harvest. June seemed to be more productive than July has proven so far, but that first harvest probably heavily weighs in on Junes total.
Tuesday, May 12, 2015
Tree House Tree
Tree house Tree
This big old pine used to be home to a simple deer stand. It also happens to live at the entrance to the future food forest. You can see the old gate post laying on the ground in the front of the before picture. Just through that old gate is the turn around that was cleaned up in a previous post. Three strands of barbed wire still run from the tree off to the right. This morning I cleared out some younger pines, a couple of miscellaneous hardwood trees that just happened to be living in the wrong place at the wrong time and a lot of little privet shoots from the tree house area. In the after picture, from left to right, Meredithe, Amelia and Carley are marking the corners of a rectangle of pines that I left for possible supports for a raised deck area off of the tree house. Additional supports will almost certainly be necessary, but having the live trees on the corners would really be beautiful. I realize it's a fairly large area, but if you're going to dream, you might as well dream big.
Tuesday, April 28, 2015
Wedding Garden Map
The four wispy looking things on the corners represent the rosemary bushes. The six flowers with the green background represent the gardenia bushes. The four big white flowers represent the azaleas. The two bushes on the right with the large clusters of little white flowers represent the butterfly bushes.
Monday, April 20, 2015
Wedding Garden Border
This is an outdated picture at this point, since so much has changed already this Spring, but it gives you an idea of the area. This is part of the main pasture that you saw in a previous post. The section that has been taken down fairly low to the ground with the weed whacker is about 50'x60'. The sections of really dirty lattice are parallel to the longer 60' sides of what will be the wedding garden. They're held up by PVC pipes that are buried in the ground about a foot and a half. Not cemented, just buried. Not sure how well they'll hold up, but they're really just there to hold back the blackberries this summer. All of the lattice and posts are re-purposed from the rose garden near the front of the property. The garden itself will be 40'x60', but we trimmed down the extra 5' on the longer Northern and Southern edges while we put in the flowering shrubs etc that will become the border of the garden. The corners are marked with posts, and there are black planters on top of them to make them more visible for the picture. The cinder block half way across the far side is marking where the arbor will be placed. There are mounds behind this flatter area that we may flatten out when we put down some clover this Spring, but they may be left through the wedding and flattened out when we have the heavy equipment in to repair the driveway and prepare the site for building our home.
The only bushes in place in this photo are four azaleas. They have white blooms on them already this Spring. Meredithe wanted mainly white flowers for the wedding, so we went with the white azaleas. It was pouring when we put in 12 more bushes this past weekend, so I don't have photos yet, but I think we've planted all of the main perennials that we're going to plant this Spring. The four corners marked by posts in this picture are now home to 4 large rosemary clippings taken from a relatives bush, hopefully they'll take root and thrive. Spaced 10' apart between the rosemary and azaleas are 6 gardenia bushes, Meredithe's favorite. The near border in this photo is now home to two white flowering butterfly bushes, 10' in from each corner. Putting them in during a rainstorm was quite pleasant! It made the dirt easier to move, even though it was heavy. It also kept it cool even though we were out in the open. I'll be sure to post pictures soon so you can see the full layout.
Tuesday, April 14, 2015
Goji Berries
Goji Berries
This little guy is our first Goji Berry bush. The Goji berry, or Wolfberry, as it is sometimes referred to, is a delicious little berry similar to a cranberry or blueberry in flavor. They have been cultivated in China for centuries, and and are prized for their uses in ancient Chinese medicinal practices. These claims have not been substantiated by modern medicine, but what we do know is that the berries are very high in antioxidants. In clinical trials Wolfberry juice significantly reduced levels of blood sugar, cholesterol and triglycerides in as little as 10 days.In the US we normally see them in their dried form, but they can be eaten dried, raw, or traditionally they are cooked into soups or teas. Although not native to North America, we selected them for their rich antioxidants and their ability to grow just about anywhere (zones 2-10, although you may want to winter them in a greenhouse in the colder zones). They are a species of boxthorn and are related to potatoes, tomatoes, eggplants and other members of the nightshade family. For this reason Goji berries may not be for everyone since some people are sensitive to nightshades. Also, those on medications such as warfarin or other blood thinners should consult their physician before consuming Goji berries as they may amplify the blood thinning effects, possibly attributable to the antioxidants. I say stop taking the drugs and eat the berries instead, but I'm not a doctor.
The plant naturally grows as long rambling canes, hanging fairly low to, or running along the ground. In cultivation the plants are often staked or trellised. I've also heard that if you successfully intertwine four or five of the strongest canes on a young plant you can train them into a shrub, almost resembling a dwarf tree. I plan on training them up this fan trellis for now with the possibility of weaving the canes in the future.
Update 4/20/2015: Checked on our Goji berry bush this weekend and something thinks that the leaves are delicious! Not sure if it'll survive due to the severe leaf loss, but it may be early enough in the Spring to recover. Guess we'll just have to wait and see...
Friday, April 10, 2015
Paw Paws
Paw Paws
In an effort to move toward a more sustainable future we've begun working our little piece of the world with permaculture design principles in mind. Permaculture is a regenerative, self maintained agricultural system which attempts to model natural ecosystems. Plant and animal species native to our region are preferred, when comparable, to non-native species when deciding which plants and animals we choose to either plant or allow to thrive on our homestead. With this in mind, we have started introducing paw paws into what we hope will become a food forest on the Northern half of our land. The paw paw is a member of the Asimina genus, which is the only member of the Annonaceae family not confined to the tropics. The fruit is a large edible berry 2-6" long and about 2" wide. It looks something like a papaya, and tastes something like a banana or a mango. Since the paw paw is both native to Eastern North America, and high in protein, we thought it would be a beneficial and non intrusive addition to our food forest. We started with two little whips, each only about two feet tall. Since we have a significant deer population we planted them inside tomato cages wrapped in plastic. This should protect the little guys from getting eaten while they're young. The plastic also blocks some sunlight. Since paw paws are an understory tree, too much direct sunlight could be harmful while they're young. The tomato cages are recycled from the garden we're clearing in the front. The plastic was cut from a huge 100'x10' strip that I pulled out of a creek. I have the remainder rolled up and saved for future projects. These two should start bearing fruit in four or five years, but we may add a few more whips next year. The two we have should cross pollinate, but two whips from a different nursery next year could add diversity and improve our chances of consistent harvests.
Not on our land, but what ours will look like in 4-5 years, hopefully... |
New growth on the paw paw whip |
Subscribe to:
Posts (Atom)